And what does the Lord require of you but to do justly, and to love kindness
and mercy, and to humble yourself and walk humbly with your God? (Micah 6:8)

Sunday, July 28, 2013

Faith, Hope, and Love

Hello friends!  Made it back from the beach just in time to play along with the Dare to Get Dirty challenges over at Splitcoaststampers.  Usually I'm still on vacation during this big event, but this year maybe I'll be able to finish all forty-two challenges since we're back early...wishful thinking!  I know I'll need to double up on some of them...it takes me waaaaaay to long to finish a card!  For this first one I combined Lynn's challenge with a CASE from today's Featured Stamper, Sarah.Jane!  What a fabulous GALLERY she has!  I chose her Clearly Sentimental About Anniversaries card to CASE.

Creative Nugget:  Both the scripture verse featured on the fishtail banner and the lovebird image are from two sets by Our Daily Bread Designs, Love Scriptures and To the Lovebirds.  They were both stamped with Early Espresso ink on some Authentique DP. The Crocheted Border Die on the vertical panel is also by Our Daily Bread Designs.  All of the Authentique DP layers were stitched to Vintage Cream card stock and attached to a Vintage Cream card base with the lower right corner rounded.  A Prima pearl flourish was added at the bottom and a pleated ribbon flower was made by twisting the ribbon onto a circle cut from a super tacky sheet.  A Pearl brad was added to the center of the flower and some Spellbinders Foliage leaves were added to finish the card.  

Here are the stamp sets and the die 
from ODBD used on this card:
Thanks so much for stopping by...Have a super Sunday!

Hugs,
Cathymac

Friday, July 26, 2013

SNSS Celebrates Christmas in July

Hello friends...just a short post for you today as I'm away for the day.  I wanted to let you know about two new Christmas die sets being released today at Sweet 'n Sassy Stamps...just in time to get a jump start on making those Christmas cards!  Both of them have coordinating stamp sets to make your Christmas card stamping a snap!


Here are two samples I made using these sets and the matching dies:

Creative Nugget: This card was made with the Poinsettia clear stamp set and the Poinsettia die.  Several poinsettias were cut with the die, colored with Copic Markers, and some were cut apart to layer for texture.

Creative Nugget:  The Vintage Ornament was stamped hanging from the berry branch from the God's Purpose stamp set.  Four ornaments were cut with the matching die and everything was colored with Copic Markers.  The die cut ornaments were scored and folded in half and the halves attached to form a 3-D ornament. Wouldn't these 3-D ornaments look lovely attached to a Christmas tree with some pretty ribbon?  The newly released Doily Border Die was used to separate the panels of card stock and DP.  The sentiment is from the Holly Jolly Christmas stamp set.

I hope you've enjoyed my samples!  For more fabulous Christmas inspiration using the new dies, visit the Sweet 'n Sassy Blog.  There you will find information about the hop, the PRIZES, and the linky list to continue the hop!

Thanks so much for stopping by...Enjoy the hop!

Hugs,
Cathymac

Saturday, July 20, 2013

Soul Mate

Hello friends...Wooo Hooo...two posts in one day!  When I saw the Inspiration Challenge for today, it gave me the push I needed to finish a card that I had started last week.  Then I discovered it also fit the Shining the Light Challenge at Our Daily Bread Designs where Chris challenged us to make a card using white or cream and the addition of one other color, so I'll be entering that one as well.  Here's the double challenge card created using Love Scriptures, a stamp set just released this month by Our Daily Bread Designs.

Creative Nugget:  The background was created with the Swiss Dots embossing folder and the Quatrefoil Pattern Die.  Half of a Labels one die was cut from the Dotted Swiss half.  Black velvet ribbon divides the two halves.  The Scripture verse was stamped on Solar Crest and cut with a Spellbinders Decorative Labels Die and popped up in the cut out.  The rose was made with tissue paper and the Rose Creations Dies also from Spellbinders.  Some Foliage die cuts and a charm finish the card.

Here are the supplies used that are available from the 


Hope you like this one.  I have my anniversary card finished ahead of time for this year!  Hope my hubby will like it!

Thanks for stopping by...have a fabulous Saturday!

Hugs,
Cathymac

Delightful Doilies With a Spin

Hello friends and stampers!  I hope you've had a wonderful, COOL week!  It's been sweltering here, so not many walks were taken.  Kody will be ready for a good long run when the weather cools off a bit!  

Since it's the third Saturday of the month, there's a SPIN on the new sketch at The Sweet Stop!  Use DOILIES on your stamped creation for a chance to win a $15 gift certificate to the Sweet 'n Sassy Store.  What a timely spin since
Sweet 'n Sassy Stamps just released a new clear stamp set called Delightful Doilies and what a beautiful set it is, so that's what I used for this week's sample.

Creative Nugget:  This card was a mixed media experiment.  Three doilies were stamped in VersaMark ink and clear embossed on mixed media paper.  Water was sprayed on the panel before spraying on Dirty Martini, London Blue, and After Midnight Dylusions.  This was then wiped with a paper towel and heat dried. The other two doilies were white embossed on Blueberry Sky and Winter Wisteria card stocks.  The same Dylusions colors were sprayed on a craft mat and then spritzed with water.  The doilies were dabbed in the ink, fussy cut, and popped on the doily background.  This panel was matted in True Black and popped onto a Solar Crest card base after adding a lace border.  The Mini Tag Die was stamped with a sentiment from the Special Friends stamp set and tied onto the lace along with a seam binding bow.  A few pearls and a button tied with floss were added to finish the card.  I'm sure if I tried this again, the results would be quite different which is what makes mixed media so much fun!

Take a look at all the amazing samples made by the Sugar Babies this week.  Then take out your doilies and play along with SSS220 at The Sweet Stop for a chance to win the prize.

Sugar Babies
Ann Tuck
Ceal Pritchett
Cynthia Olheiser
Debbie Owens
Jamie Moore
Marlena Peduzzi
Melissa Schultz
Monika Davis
Robin Parker
Stephanie Serrano

Thanks so much for stopping by...have a delightful weekend!

Hugs,
Cathymac

Card Recipe
Stamps: Delightful Doilies, Special Friends (SNSS)
Ink: Versafine Onyx Black, VersaMark (Tsukineko), Shaded Lilac Distress Ink (Ranger)
Paper: Solar Crest (Neenah), True Black, Blueberry Sky, Winter Wisteria (PTI), Mixed Media (Strathmore)
Accessories: Mini Tag Dies (SNSS), Dirty Martini, London Blue, and After Midnight Dylusions (Ranger),Clear EP (Stewart Superior), White EP (WOW!), Seam Binding (Really Reasonable Ribbon), Button, Kaiser Pearls, Lace 

Tuesday, July 16, 2013

Majestic Monarchs

Welcome back to Day 4 of Sweet 'n Sassy Stamps July Release Features.  If you like butterflies, you'll find yourself reaching for this beautiful set time and time again!
Today's feature is:
Majestic Monarchs
  • Stamp set includes 6 images and 3 sentiments
  • Set measures approximately 4" x 6"
  • The largest butterfly image measures approximately 2 1/2 " x 1 3/4"
  • Designed by Korin Sutherland
  • Stamp set is priced at $15
Here are several cards made with THIS beautiful set:

Creative Nugget:  These are not my typical colors and were inspired by the Color Challenge today on Splitcoaststampers.  I wasn't sure I was going to like them, but I was pleasantly surprised!  The flight of butterflies were stamped on Vintage Cream and colored with Copic Markers.  The large butterfly was stamped again on vellum, embossed, colored on the back, cut out, and popped onto the panel.  Two hand cut fishtail banners, one in Winter Wisteria, and the other in Basic Grey DP were stitched to the same panel.  The Hawthorne quote was stamped on a Decorative Plaque Die and a Decorative Frame Topper was added to the top and bottom with Winter Wisteria ink.  The plaque was popped on the card and the left end trimmed even with the panel. All panels were sponged with Brushed Corduroy Distress Ink and mounted to a Vintage Cream card base which was also sponged. A few pearls were added to finish the card.

These cards were in a previous post, but you might have missed them and I thought you would enjoy seeing them again.

and
Love these butterflies with the doilies!

Click on the thumbnails below to see more amazing Majestic Monarchs samples created by the Sweet 'n Sassy Design Team!

Be sure to leave a comment on each blog along the way because we're giving away this wonderful stamp set to one lucky commenter!

The deadline to comment for a chance to win is Friday, July 19th at midnight EST.  The winners will be announced on our website homepage on Monday, July 22nd.

Thanks so much for stopping by...enjoy the hop!  Come back tomorrow for the last feature...you don't want to miss this one!

Hugs,
Cathymac

Monday, July 15, 2013

For the Lovebirds

Hello again, friends!  This is my second post, just a short one, for today so scroll down for the Sweet 'n Sassy Stamps July Release Feature or click HERE.

I usually don't get a chance to play along with the Clean & Simple (CAS Challenge) over at Splitcoaststampers because of my work schedule, but my schedule has changed and so I got to play along today.  CAS is difficult for me since I love layers, but I'm trying, so be nice!  LOL!

Creative Nugget:  We were to use Sahara Sand, Melon Mambo, Primrose, and White for the colors.  I had to substitute Pretty in Pink since I didn't have the Primrose color.  The bird cage from the newly released stamp set, To the Lovebirds by Our Daily Bread Designs, was stamped in VersaMark ink on Sahara Sand paper and cut with the matching die from the Bird Cage and Banners Dies.  The doors of the birdcage were cut open using a craft knife to reveal the lovebirds inside.  The banner and sentiment from the Banner Sentiments stamp set were stamped and die cut as well.  The birdhouse image was stamped again using pretty in Pink ink on a Solar Crest panel to create a kind of shadow.  Piercing was added to this panel...not a CAS technique, but I couldn't resist, before matting it with with Sahara Sand.  An e.k. success border was punched from Melon Mambo and added to the panel along with some pretty ribbon before adhering it to a Solar Crest card base.  A few scattered gems were added to finish the card.


Here are the materials used that can be found at the 


Thanks so much for stopping by....again!  Have a wonderful day!

Hugs,
Cathymac

Card Recipe
Stamps: To the Lovebirds, Banner Sentiments (ODBD)
Ink: Versafine Onyx Black, Versa Mark (Tsukineko), Spun Sugar and Pumice Stone Distress Ink (Ranger), Pretty in Pink (SU!)
Paper: Solar Crest (Neenah), Sahara Sand, Melon Mambo (SU!)
Accessories: Bird Cage and Banner Dies (ODBD), Border Punch (e.k.success), Canvas Impression Plate (PTI), Piercing Tool, Ribbon, Rhinestones

Get Well Wishes

Good morning sweet friends!  It's the beginning of a new week and time for Day 3 of the Sweet 'n Sassy Stamps features! Guess who's back?  None other than everyone's favorite adorable little mouse...Cocoa!
Today's features are:
Cocoa's Get Well Wishes and Wishing You Well
  • Stamp set includes 2 images and 8 sentiments
  • Set measures approximately 4" x 4"
  • The RX Cocoa image measures approximately 2" x 2"
  • Designed by Korin Sutherland
  • Stamp set is priced at $11

  • Stamp set includes 7 sentiments
  • Set measures approximately 4" x 4"
  • The Get Well Soon sentiment measures approximately 2" x 1/4"
  • Designed by Diane Zechman
  • Stamp set is priced at $9

I used both Cocoa's Get Well Wishes and 
Wishing You Well for my get well card.
Creative Nugget:  I had forgotten how much fun it is to color Cocoa.  The RX Cocoa image was colored with Copic Markers, cut with a Classic Circle Nestie, and mounted to a Raspberry Fizz circle after piercing around the image.  A Scalloped circle was cut from Raspberry Fizz and the Basic Grey DP layer.  This panel was matted in Raspberry Fizz and a bow was tied around.  The DP layer and image were attached to a panel of Solar Crest card stock that had been stitched to Raspberry Fizz and mounted to a Solar Crest card base.  The sentiment from the Wishing You Well set was stamped in the lower right corner and a scattering of rhinestone stickers were applied to finish the card.  This card is ready to be sent to someone who needs a cheery get well wish!

To see more fabulous samples created by the talented Design Team, click on the thumbnails below!

Be sure to leave a comment on each blog along the way because we're giving away one of these sets to two lucky commenters!

The deadline to comment for a chance to win is Friday, July 19th at midnight EST.  The winners will be announced on our website homepage on Monday, July 22nd.

We have two more days of features so be sure to stop back again tomorrow!  Have a wonderful day...and stay cool!

Hugs,
Cathymac


Sunday, July 14, 2013

Delightful Doilies

Happy Sunday friends and welcome to Day 2 of Sweet 'n Sassy Stamps July Release Features.  I hope you are having a wonderful weekend!  Get ready to be awed by some beautiful samples created just for you!
Today's Features are:
Delightful Doilies and Faith

  • Stamp set includes 6 images and 3 sentiments
  • Set measures approximately 8" x 6"
  • The image measures approximately 3 1/2" x 3 1/2"
  • Designed by Dina Kowal
  • Stamp set is priced at $26
  • Stamp set includes 7 sentiments
  • Set measures approximately 4" x 4"
  • Martin Luther quote measures approximately 1 3/4" x 1 1/8"
  • Designed by Korin Sutherland
  • Stamp set is priced at $11

My sample uses both Delightful Doilies and Faith.
Creative Nugget:  The inspiration for my card came from Jeanne (aka akeptlife), todays Featured Stamper on Splitcoaststampers.  I CASEd her Dollface Red card and turned it into Turquoise Doilies. The doily image was stamped in a pattern with Tempting Turquoise ink on a Solar Crest panel.  A strip of retired SU! designer paper and a turquoise Doily Border were added to the left side of the card.  This panel was matted in True Black and attached to a Solar Crest card base.  The sentiment was cut with a Twisted Metal tag die from Spellbinders.  A dyed seam binding bow and black Twinkle Goosebumps finish the card.  This card is rather CAS for me and came together very quickly.

To see more fabulous samples created by the talented Design Team, click on the thumbnails below!

Be sure to leave a comment on each blog along the way because we're giving away 1 of these sets to two lucky commenters!

The deadline to comment for a chance to win is Friday, July 19th at midnight EST.  The winners will be announced on our website homepage on Monday, July 22nd.

Thanks so much for stopping by!  Enjoy the hop and be sure to stop back again tomorrow for Day 3 of the features and some more fabulous eye candy!

Hugs,
Cathymac

Saturday, July 13, 2013

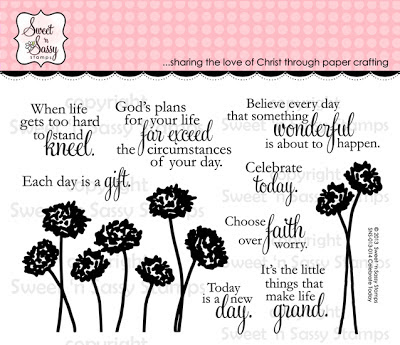
Celebrate Today

Happy Saturday sweet friends!  We're going to double the fun on this post as not only is it time for a new sketch at The Sweet Stop, but it's Day 1 of the Sweet 'n Sassy Stamps July Release Feature Hops.  I have several cards to share with you using today's featured stamp set, one of which uses the new sketch for this week! So...let's get started!
Today's feature is:
Celebrate Today & Doily Border Dies


  • Stamp set includes 2 images and 8 sentiments
  • Set measures approximately 6" x 4"
  • The large image measures approximately 3 1/4" x 2 3/8"
  • Designed by Korin Sutherland
  • Stamp set is priced at $15
  • Set of 2 dies
  • Dies measure approximately 3/4" x 6"
  • Designed by Korin Sutherland
  • Priced at $11.50

Here is what I created using Celebrate Today and the Doily Borders...first The Sweet Stop sketch:


Creative Nugget: The MY Mind's Eye DP was stitched to a Vintage Cream panel and mounted to a Vintage Cream card base after being sponged with Walnut Stain Distress Ink.  The two Doily Border pieces were die cut from matching DP as well.  The sentiment was stamped on a piece of Vintage Cream card stock with Versafine Onyx Black ink.  Then large flower image from the Celebrate Today set was stamped in VersaMark ink and clear embossed over the sentiment.  This panel was cut with a Circle Nestie and sponged with Pine Needles Distress Ink.  This was mounted on a Spellbinders Accent piece and popped on the card.  Several scattered pearls and a seam binding bow finish the card.

The second card uses the Shape Dies to create a vase for the flowers.


Creative Nugget: The top of a Solar Crest panel was embossed with a Cuttlebug Folder and the bottom was stamped with a sentiment from the Be Encouraged stamp set.  The Chevrons were die cut out of scraps of Cosmo Cricket DP and mounted on True Black card stock to make the border.  A ribbon was tied around the border panel before it was attached to the card.  This was matted with True Black and mounted to a Solar Crest card base. The flower image was colored with water-based markers and stamped on a piece of Solar Crest.  This panel was cut with a Rectangle Nestie and slightly sponged with Tumbled Glass Distress Ink.  The vase was cut with the Shape Dies from Cosmo Cricket scraps and a few leaves punched to add to the vase.  Two black pearls were added in the corner to finish the card.

My third and final card used the Freshly Made Sketch for this week. 


Creative Nugget: The flowers were stamped directly on the Fine Linen Gingham PD with Versafine Onyx Black ink and Stickles added for a bit of sparkle.  This panel was mounted to a Fine Linen panel embossed with the Canvas Impression Plate. A diagonal sentiment strip stamped with one of the sentiments from the Celebrate Today set was matted with black and attached to the card.  A True Black Doily Border, scattered pearls, and a black bow finish the card.

I hope you've been inspired by the cards made with this very versatile stamp set.  Please check out more fabulous creations by
The Sweet Stop Sugar Babies:

Robin Parker (on vacation)
  
Then...to see more fabulous samples created by the talented Design Team, click on the thumbnails below!

Be sure to leave a comment on each blog along the way because we're giving away one of these sets to two lucky commenters!

The deadline to comment for a chance to win is Friday, July 19th at midnight EST.  The winners will be announced on our website homepage on Monday, July 22nd.

Thanks so much for stopping by...enjoy the hop!

Hugs,
Cathymac

Friday, July 12, 2013

SNSS July Release


Hello sweet friends!  Sweet 'n Sassy Stamps is releasing seven new stamp sets and two die sets for the month of July...Whoooo-hoooo!  From elegant doilies and butterflies to fun in the sun images, you're sure to find something just right for you!

If you were able to join us on our member forum last night at Splitcoaststampers for the Release Party, you've already seen the full reveal of all the new goodies and fabulous samples made with each of the new stamp sets.  If not, here is the scoop on all the new sets:


To see the July release in its entirety, be sure to visit the Sweet 'n Sassy Stamps Blog and then visit the Store where all the new items are available!

Before you go, here is a sample using several of the new sets...Celebrate Today, Majestic Monarchs, Delightful Doilies, and the Doily Border Dies.


Thanks so much for stopping by!  Be sure to stop back again tomorrow for the first of the Feature Hops...one lucky commenter will be chosen to win the featured stamp set!

Hugs,
Cathymac 


Looking Back at the July Release

Hello friends and stampers!  Today we are looking back at Our Daily Bread Designs July Release.  Here is the card I created using To the Lovebirds, Banner Sentiments, and the Bird Cage & Banners Dies.


Creative Nugget:  Webster's Pages DP was stitched to Smokey Shadow card stock and mounted to a Vintage Cream card base. Opulent Ovals and Twisted Metal Accents were die cut from Vintage Cream and the middle oval sponged with Spun Sugar Distress Ink.  The birdcage was stamped, embossed, cut with the matching birdcage die, and colored slightly with Copic Markers. The banner was stamped, the sentiment from Banner Sentiments added, and both were cut with the matching die.  Copics were used to color the bunting at the bottom which was made with three die cut banners and layered on the card front.  The die cut birds, pearls, and a silk bow finish the card!  

These stamp sets and the matching die set available at Our Daily Bread Designs are wonderful for creating elegant looking cards for any occasion!


For more inspiration using the stamp sets from the July Release, be sure to visit the ODBD Blog!

Thanks so much for stopping by!  Have a wonderful day!

Hugs,
Cathymac